
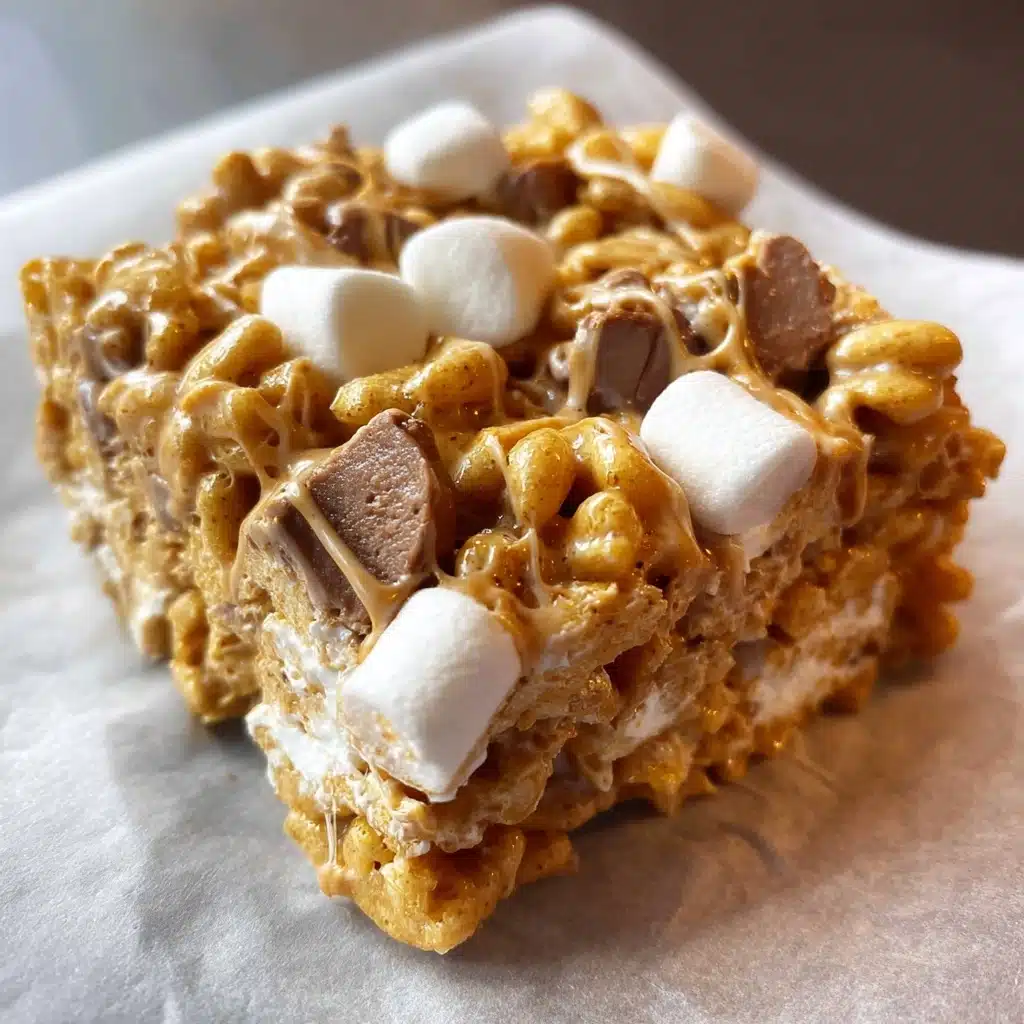
No Bake S’mores bars Recipe
If you’re craving childhood nostalgia with a deliciously easy twist, these No Bake S’mores bars are guaranteed to hit the sweet spot! Imagine everything you love about gooey, golden campfire s’mores, but packed into chewy, marshmallowy bars—no sticks, no fire, just pure joy and zero fuss. Whether you need a quick treat for a party or a fun after-school snack, these bars will have everyone reaching for seconds (and maybe thirds). I absolutely can’t wait to walk you through how to craft this irresistible dessert in no time at all!
Ingredients You’ll Need
One of my favorite things about this recipe is how it takes just a few classic ingredients, each playing a starring role in taste, texture, or sweetness. Keep these pantry faves on hand and you’re always ready to whip up a batch of No Bake S’mores bars!
- Graham Cracker Cereal: This brings iconic s’mores flavor and a wonderful crunch—look for an 11.7-ounce box for the perfect amount.
- Mini Marshmallows: Essential for that gooey s’mores texture; set aside some to mix in at the end for extra marshmallow pockets.
- Butter: Just four tablespoons, but it’s the magical ingredient that melts things together and adds rich flavor.
- Hershey’s Bars: Broken into pieces so you get melty, creamy chocolate bits in every bite—nothing says s’mores quite like this chocolate!
How to Make No Bake S’mores bars
Step 1: Prep Your Pan and Marshmallows
Start by greasing a 9 x 13 inch pan well—this keeps the bars from sticking and makes cleanup so easy. Next, scoop out 2 cups of mini marshmallows to set aside; you’ll stir these in at the end for those dreamy, gooey pockets throughout your No Bake S’mores bars.
Step 2: Melt Butter and Marshmallows
Grab a large microwave-safe bowl and add the remaining mini marshmallows along with the butter. Microwave in 30 second bursts, pausing each time to stir. The marshmallows should melt smoothly after about 90 seconds. Don’t skimp on the stirring: it helps everything melt evenly and stays silky without scorching.
Step 3: Coat the Graham Cereal
Now it’s time to transform simple cereal into pure bliss! Stir the graham cracker cereal into the warm, melted mixture using a greased wooden spoon (this trick keeps the sticky goodness from taking over your hands). Scrape along the sides and bottom to ensure every bit is completely coated—no dry corners allowed.
Step 4: Add Chocolate and Extra Marshmallows
Here comes the s’mores magic! Gently fold in the Hershey’s chocolate pieces and the reserved marshmallows. This gives you delicious pools of chocolate and gooey marshmallows in every square, so every bite feels extra special.
Step 5: Press Into the Pan
Pour the cereal mixture into your prepared pan. Use parchment or wax paper to firmly press the mixture across the whole pan for nice, even bars (plus, it keeps your hands clean and marshmallow free!). Pressing evenly will make all the difference when slicing later.
Step 6: Set and Slice
If you aren’t blinded by temptation, let your No Bake S’mores bars set for about 20 minutes. Patience is tough, but the bars will slice beautifully and hold their shape much better once cooled. Trust me, the anticipation just makes them taste even better!
How to Serve No Bake S’mores bars
Garnishes
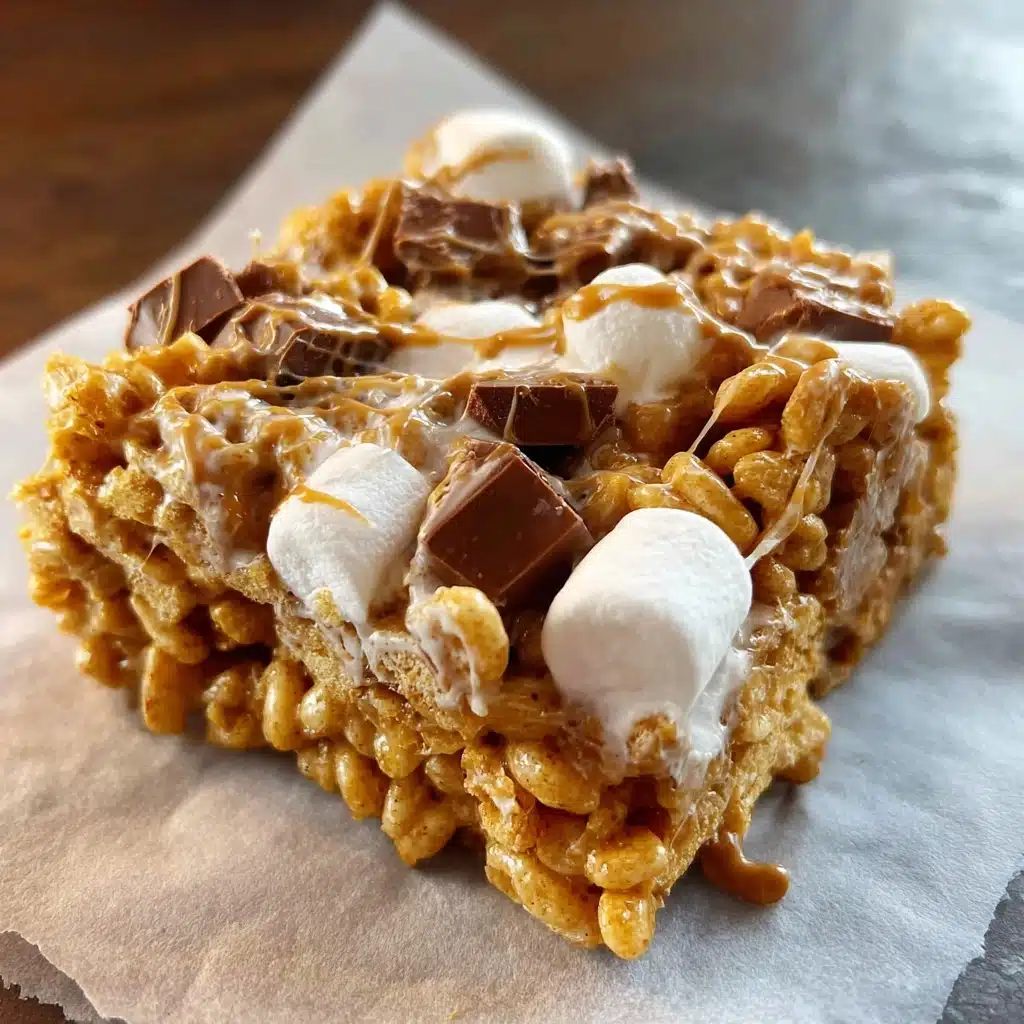
Dress up your No Bake S’mores bars with a sprinkle of extra chocolate chips, a drizzle of melted chocolate, or a scatter of mini marshmallows on top for even more visual (and edible) appeal. If you really want to impress, a pinch of flaky sea salt on top makes the flavors pop!
Side Dishes
Serve these dreamy bars with cold milk or creamy hot chocolate for the ultimate after-dinner treat. Pair them with a fresh fruit platter or even a scoop of vanilla ice cream to balance all that sweet, nostalgic richness.
Creative Ways to Present
Cut the bars into mini squares for bite-sized party treats, or use fun cookie cutters for holiday shapes. For an outdoor feel, wrap individual No Bake S’mores bars in parchment and tie with twine—perfect for gifting or a picnic-style dessert tray.
Make Ahead and Storage
Storing Leftovers
Keep your No Bake S’mores bars in an airtight container at room temperature for up to 4 days. They stay soft, chewy, and delicious, making them perfect for advance prep or lunchbox treats throughout the week.
Freezing
If you want to extend their life, you can freeze the bars! Layer them between sheets of wax or parchment paper in a well-sealed container and freeze for up to 2 months. Just thaw at room temperature when you’re ready to snack—no need to reheat.
Reheating
These bars are best enjoyed at room temperature, but if you’re after a slightly gooier bite, pop one in the microwave for just 5–10 seconds. The chocolate gets delightfully melty and the marshmallows become extra soft—almost like sitting around the campfire again!
FAQs
Can I use full-size marshmallows instead of mini?
You can, but mini marshmallows melt more quickly and evenly. If you only have full-size, chop them up a bit before melting for smoother results.
What if I can’t find graham cracker cereal?
No worries! Crushed graham crackers (with a slightly coarse texture) are a great substitute. Just use about 8 loosely packed cups.
Can I double the recipe?
Absolutely! Just use a larger pan or make two batches. The only tricky part is making sure your bowl is big enough for stirring.
Can I swap in dark chocolate or chocolate chips?
Definitely! Dark chocolate adds a rich twist, and semi-sweet or even white chocolate chips work beautifully for a fun variation.
Do No Bake S’mores bars travel well?
They’re fantastic for road trips, potlucks, or school events. Just stack them between wax paper in an airtight container for easy grab-and-go treats that won’t make a melty mess.
Final Thoughts
Whether you’re reliving campfire memories or introducing someone to this sweet tradition, these No Bake S’mores bars bring all the fun, flavor, and ease without ever having to light a fire. Gather your ingredients and give them a try—you won’t believe how quickly they disappear. Happy snacking!
Print
No Bake S’mores bars Recipe
- Total Time: 30 minutes
- Yield: 1 9×13-inch pan 1x
- Diet: Vegetarian
Description
These No Bake S’mores Bars are a quick and easy treat that captures the classic flavors of s’mores in a simple, no-fuss recipe.
Ingredients
Graham Cracker Cereal:
- 8 cups
Mini Marshmallows:
- 10 ounces (divided)
Butter:
- 4 tablespoons
Hershey’s Bars:
- 2 bars (broken into pieces)
Instructions
- Grease Pan: Grease a 9 x 13 pan and set aside 2 cups of mini marshmallows.
- Melt Butter and Marshmallows: In a large microwave-safe bowl, melt the butter and mini marshmallows together, stirring every 30 seconds until smooth (about 1 minute and 30 seconds).
- Add Cereal: Stir in cereal and mix well using a greased wooden spoon, ensuring all cereal is evenly coated.
- Combine Ingredients: Mix in the broken chocolate pieces and remaining marshmallows.
- Press into Pan: Transfer the cereal mixture into the prepared pan and press it evenly using parchment or wax paper.
- Set and Serve: Allow the bars to set for about 20 minutes before cutting and serving.
Notes
- For a gooier texture, you can add more marshmallows or marshmallow cream.
- Feel free to customize by adding nuts, dried fruit, or other mix-ins.
- Prep Time: 10 minutes
- Cook Time: 0 minutes
- Category: Dessert
- Method: No-Bake
- Cuisine: American
Nutrition
- Serving Size: 1 bar
- Calories: 180
- Sugar: 14g
- Sodium: 90mg
- Fat: 5g
- Saturated Fat: 3g
- Unsaturated Fat: 2g
- Trans Fat: 0g
- Carbohydrates: 32g
- Fiber: 1g
- Protein: 2g
- Cholesterol: 5mg
Keywords: S’mores, No Bake, Dessert, Easy Recipe, Quick Treat

