
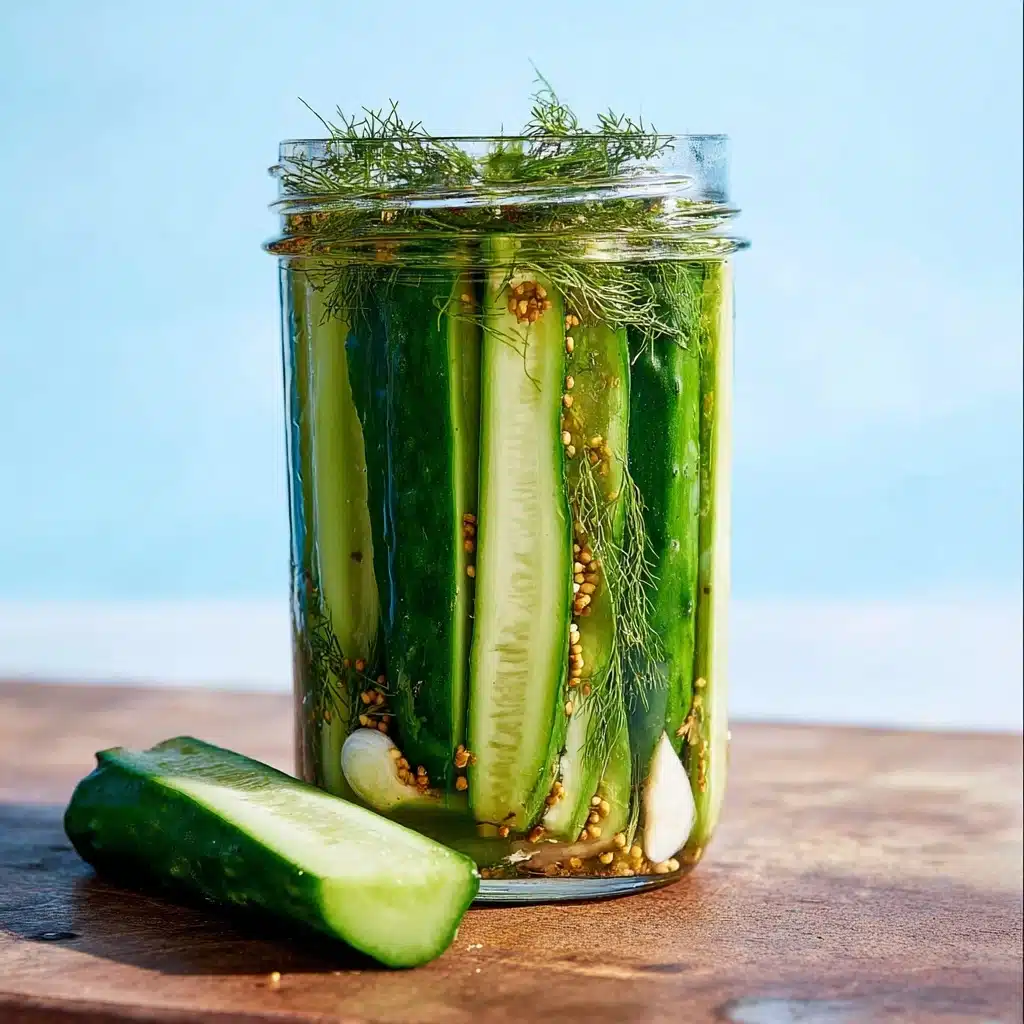
Dill Pickles Recipe
If you’re craving something crisp, crunchy, and brimming with tangy flavor, homemade Dill Pickles are a must-have addition to your kitchen repertoire. There’s nothing like the satisfaction of popping open a jar and grabbing a pickle you crafted yourself! They’re one of those rare treats that bridge the gap between nostalgia and freshness, guaranteed to make sandwiches, burgers, and even simple snack platters sing. This recipe lets you skip the supermarket jars and whip up classic, aromatic pickles at home—no fancy equipment required.
Ingredients You’ll Need
Making Dill Pickles is all about letting a handful of quality ingredients shine. Each element plays a star role, creating layers of flavor, irresistible crunch, and that signature tang you know and love.
- 2 1-pint wide-mouth mason jars with lids: Wide-mouth jars make it easy to pack your pickles and pour in the brine.
- 1½ to 2 pounds small cucumbers (like Kirby): Choose firm, blemish-free cucumbers for the crispiest pickles.
- 3 cloves garlic: Garlic brings a zesty, aromatic kick that elevates the whole blend.
- ½ tablespoon coriander seeds: These tiny seeds add gentle citrus notes and a subtle complexity.
- 1 tablespoon whole peppercorns: For a punch of peppery heat balanced against the vinegar’s tang.
- 1 tablespoon kosher salt: Essential for flavor and for drawing out the cucumbers’ moisture.
- ½ tablespoon sugar: Just enough to round out the sharp edges of the brine.
- ⅔ cup white vinegar: Provides that classic, bright pickle tang.
- 1⅓ cup water: Dilutes the vinegar for a pleasant level of acidity.
- 1 large handful fresh dill (or 2 teaspoons dill seeds): The unmistakable herb at the heart of all great Dill Pickles.
How to Make Dill Pickles
Step 1: Prep Your Jars
Start by scrubbing your mason jars and lids with hot, soapy water. A clean jar is the number one rule for delicious Dill Pickles—the last thing you want is any lingering flavors or bacteria messing with your handiwork. Set them aside to air dry so they’re completely ready for filling.
Step 2: Prep the Cucumbers and Garlic
Trim the ends off your cucumbers and quarter them lengthwise so you have perfect spear shapes that fit snugly in your jars. If they’re a bit too long, cut them down to size! Peel your garlic cloves and slice them in half, so every jar gets double the garlicky goodness.
Step 3: Make the Brine
Combine the coriander seeds, whole peppercorns, sugar, kosher salt, white vinegar, and water in a saucepan. Whisk it all together gently over low heat for about a minute—just until everything is fully dissolved and infused. Take it off the heat as soon as that happens; you don’t want to cook off all that fresh flavor.
Step 4: Pack the Jars
Now comes the fun part: load up your clean jars with the cucumber spears, sliced garlic, and a generous handful of fresh dill (or dill seeds if that’s what you’re using). Don’t be afraid to press everything in tightly—this helps the Dill Pickles stay submerged in the brine and soak up all the flavor.
Step 5: Pour in the Brine
Carefully ladle the warm brine into each jar, making sure all the cucumbers are covered. Give the jars a gentle tap on the counter to knock out any pesky air bubbles. If any cucumbers are poking above the surface, top up with a splash of water.
Step 6: Seal the Jars
Wipe each jar rim so there’s no moisture or debris, then screw on the lids until they’re hand-tight. This simple step keeps everything fresh and safe during pickling.
Step 7: Pick Your Method
If you’re after speedy, no-fuss pickles, stash the jars in your fridge for 24 hours before tasting—they’ll stay crisp and bright in the refrigerator for up to a month. Prefer to stash them for a rainy day (or next year’s picnic)? Use the water bath canning method: boil sealed jars for 10 minutes, let them cool, and then store them in a cool, dark place for up to a year. Always check for a good seal before storing outside the fridge.
How to Serve Dill Pickles

Dill Pickles Garnishes
If you love presenting food as much as you love eating it, consider garnishing your Dill Pickles platter with a sprinkle of extra dill fronds, fresh black pepper, or even thin slices of radish for extra color. A little pile of pink pickled onions alongside the pickles also looks irresistibly inviting!
Side Dishes
Dill Pickles are the ultimate sidekick. Pair them with juicy burgers, loaded deli sandwiches, or smoky barbecue for that crisp-tangy contrast. They’re also perfect with cheese boards—cut them into coins for bite-sized tangy bursts between bites of cheddar or gouda.
Creative Ways to Present
Think outside the jar! Try threading Dill Pickles onto skewers with cubes of cheese and cherry tomatoes for a party snack, or slice them thin and layer onto your favorite salads. For a fun brunch twist, add pickle spears to Bloody Marys as an edible stirrer.
Make Ahead and Storage
Storing Leftovers
Once you’ve cracked open a jar, your Dill Pickles will keep crisp and tasty in the refrigerator for up to a month—just make sure they’re always covered with brine and the jar is sealed between snacking sessions.
Freezing
Freezing is not recommended for Dill Pickles; the texture of the cucumbers turns mushy once thawed. For best results, stick to the fridge or a cool pantry (if you’ve canned them properly, of course).
Reheating
Dill Pickles are meant to be enjoyed cold or at room temperature. If you do need to add them to a hot dish, toss them in just before serving—prolonged heat softens their legendary crunch.
FAQs
Can I use different types of cucumbers for Dill Pickles?
You sure can, but smaller, firmer varieties like Kirby or pickling cucumbers give you the best signature crunch—just avoid waxy supermarket cucumbers, as their coating can mess with the brine absorption.
How soon can I eat my Dill Pickles?
If you’re making refrigerator pickles, wait at least 24 hours before tasting, though the flavor gets even better after a few days. The patience pays off!
What if my pickles aren’t as crunchy as I hoped?
Crunch depends on freshness and how quickly you get your cucumbers into the brine after picking or purchase. Also, avoid cutting cucumbers too thin, and always chill them for refrigerator pickles.
Can I make spicy Dill Pickles?
Absolutely! Add a few slices of fresh jalapeño or a pinch of red pepper flakes to the jars before adding the brine for a spicy twist that’ll blow you away.
How do I know if my canned pickles are shelf-stable?
After canning, press on the center of the lid—it should be firmly sealed and not pop up and down. If it hasn’t sealed, simply store that jar in the fridge and enjoy it within a month, just like fridge pickles.
Final Thoughts
Once you make your own Dill Pickles, you may never go back to store-bought again! They’re easy, endlessly customizable, and sure to steal the spotlight on any table. Gather your jars and cucumbers, and treat yourself and your friends to the unbeatable freshness of homemade pickles—you’ll always want a jar on hand!
Print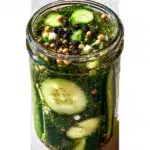
Dill Pickles Recipe
- Total Time: 1 day
- Yield: 2 pints 1x
- Diet: Vegetarian
Description
Learn how to make delicious and crunchy homemade dill pickles with this easy recipe. These pickles are full of flavor and perfect for snacking or adding to sandwiches and salads.
Ingredients
Mason Jars:
- 2 1-pint wide-mouth mason jars with lids
Cucumbers:
- 1 1/2 to 2 pounds small cucumbers (like Kirby)
Seasonings:
- 3 cloves garlic
- 1/2 tablespoon coriander seeds
- 1 tablespoon whole peppercorns
- 1 tablespoon kosher salt
- 1/2 tablespoon sugar
- 1 large handful fresh dill (or 2 teaspoons dill seeds)
Brine:
- 2/3 cup white vinegar
- 1 1/3 cup water
Instructions
- Prepare Jars: Wash mason jars and lids, and let them air dry.
- Prepare Ingredients: Quarter cucumbers, slice garlic, and set aside.
- Make Brine: In a saucepan, combine coriander seeds, peppercorns, sugar, salt, vinegar, and water. Heat until dissolved.
- Fill Jars: Pack cucumbers, garlic, and dill into jars.
- Add Brine: Pour brine over cucumbers, remove air bubbles, and top with water if needed.
- Seal Jars: Wipe rims, seal jars, and refrigerate for 24 hours for fridge pickles, or can for shelf-stable pickles.
Notes
- For extra flavor, consider adding red pepper flakes or mustard seeds to the brine.
- Adjust salt and sugar levels to suit your taste preferences.
- Prep Time: 20 minutes
- Cook Time: 10 minutes
- Category: Side Dish
- Method: Pickling
- Cuisine: American
Nutrition
- Serving Size: 1 pickle
- Calories: 15
- Sugar: 1g
- Sodium: 210mg
- Fat: 0g
- Saturated Fat: 0g
- Unsaturated Fat: 0g
- Trans Fat: 0g
- Carbohydrates: 3g
- Fiber: 1g
- Protein: 1g
- Cholesterol: 0mg
Keywords: Dill Pickles, Homemade Pickles, Canning, Refrigerator Pickles

