
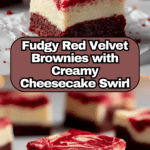
Classic Red Velvet Brownies with Cheesecake Layer Recipe
Introduction
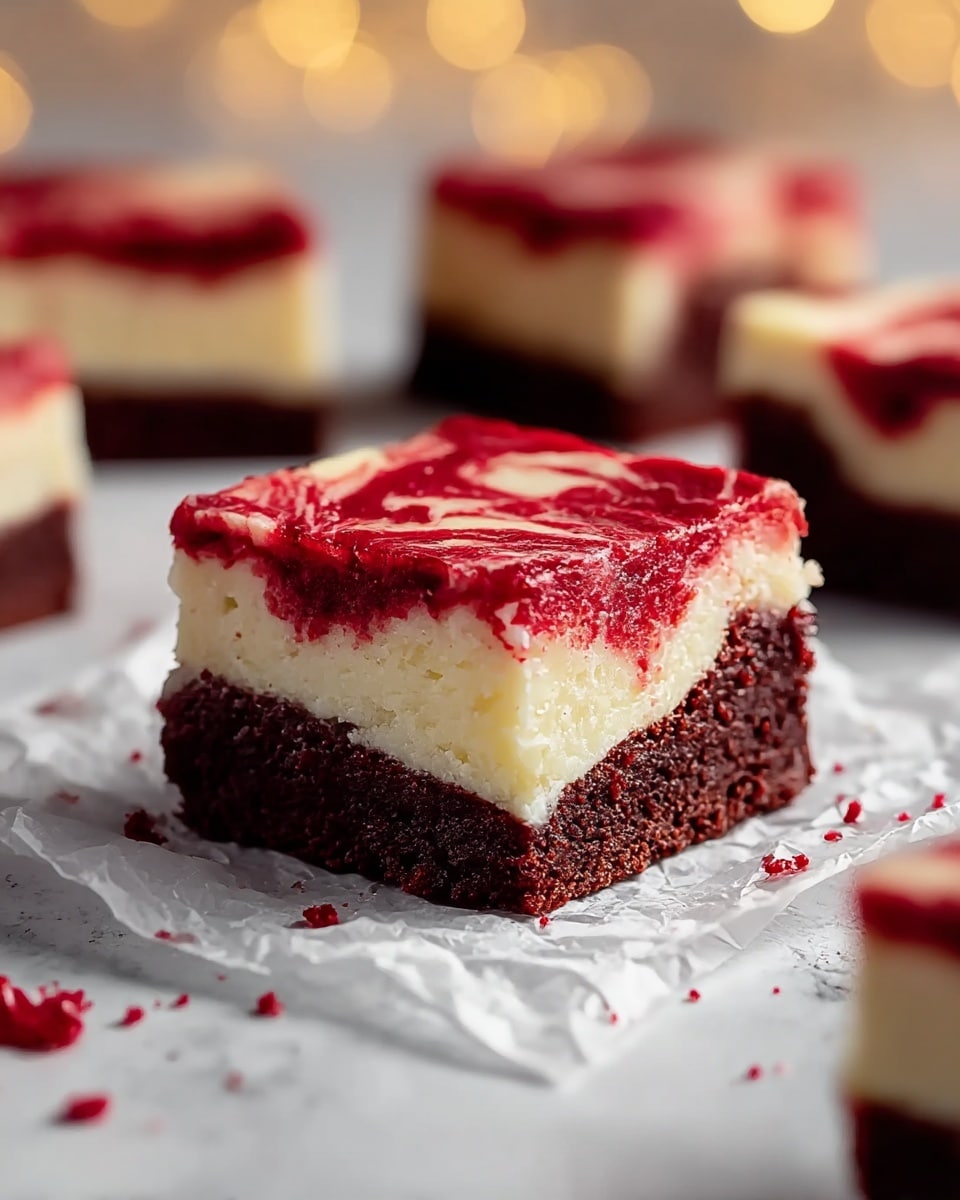
These classic red velvet brownies with a luscious cheesecake layer combine rich chocolatey fudge with creamy sweetness. The marbled effect not only looks stunning but also makes every bite a delightful mix of flavors and textures. Perfect for a special treat or sharing with friends.

Ingredients
- 5 oz butter (unsalted, preferably Kerrygold)
- 3/4 cup sugar
- 1 1/2 tsp vanilla extract
- 1/3 cup cocoa powder (Hershey’s Special Dark recommended)
- 1/8 tsp salt
- 1 1/2 tbsp red food coloring
- 1 tsp vinegar
- 2 large eggs (room temperature, about 70°F)
- 3/4 cup all-purpose flour
- 8 oz cream cheese, softened (Philadelphia original blocks recommended)
- 1/4 cup sugar (for cheesecake layer)
- 1 large egg (for cheesecake layer)
- 1/2 tsp vanilla extract (for cheesecake layer)
Instructions
- Step 1: Preheat your oven to 375°F. Grease an 8×8 inch baking dish or 9-inch square pan thoroughly with butter or cooking spray to prevent sticking.
- Step 2: Melt the butter in a medium saucepan over low heat. Remove from heat, then stir in 3/4 cup sugar until combined. Add 1 1/2 tsp vanilla, cocoa powder, salt, red food coloring, and vinegar. Mix until the cocoa is fully incorporated and the color is deep burgundy.
- Step 3: Lightly beat the room-temperature eggs in a small bowl, then add them to the chocolate mixture. Stir until smooth.
- Step 4: Gently fold in the flour with a spatula until just combined—avoid overmixing. Reserve 1/4 cup of this batter in a small bowl for the top layer.
- Step 5: Pour the remaining 3/4 of the brownie batter into the prepared pan, spreading it evenly to form the base layer.
- Step 6: In a separate bowl, beat the softened cream cheese with 1/4 cup sugar until smooth and fluffy. Add the egg and 1/2 tsp vanilla, then beat until creamy and lump-free.
- Step 7: Spread the cheesecake mixture evenly over the brownie base without disturbing it.
- Step 8: Drop the reserved 1/4 cup brownie batter in small dollops over the cheesecake layer. Using a thin knife or skewer, gently swirl in a figure-8 or back-and-forth motion to create a marbled effect. Be careful not to overmix.
- Step 9: Bake for 30-35 minutes until the top is set but still slightly jiggly in the center. The edges should pull away slightly from the pan.
- Step 10: Remove from oven and cool on a wire rack for 1-2 hours. For clean slices, refrigerate for at least 1 hour before cutting into squares.
Tips & Variations
- Use high-quality unsalted butter like Kerrygold for a richer flavor that complements the red velvet.
- Room temperature eggs help the batter mix more evenly, contributing to a smoother texture.
- Swap red food coloring with natural beet juice for a natural alternative, although color intensity may vary.
- For extra texture, sprinkle chopped pecans or walnuts on the brownie base before adding the cheesecake layer.
Storage
Store the brownies in an airtight container in the refrigerator for up to 4 days. Reheat briefly at room temperature before serving if desired, but they’re delicious chilled as well. You can also freeze the brownies for up to 2 months; thaw overnight in the refrigerator before serving.
How to Serve
Serve this delicious recipe with your favorite sides.
FAQs
Can I use regular cocoa powder instead of special dark?
Yes, you can substitute with regular cocoa powder, but the brownies may have a lighter color and slightly different flavor. Special dark cocoa gives a richer color and deeper chocolate taste.
What if I don’t have an 8×8 baking dish?
A 9-inch square pan works just as well. Adjust the baking time slightly if your pan is larger or smaller, checking for doneness a few minutes before the recommended time.
Print
Classic Red Velvet Brownies with Cheesecake Layer Recipe
- Total Time: 1 hour 50 minutes
- Yield: 16 brownies (about 2-inch squares) 1x
Description
These Classic Red Velvet Brownies with a Creamy Cheesecake Layer combine the rich, fudgy texture of red velvet brownies with a smooth, tangy cheesecake topping. Featuring a striking marbled design created by swirling reserved brownie batter on top of the cheesecake layer, these decadent treats are perfect for celebrations or anytime you crave a luxurious dessert with a hint of cocoa and classic red velvet flavors.
Ingredients
Brownie Layer
- 5 oz butter (unsalted, Kerrygold preferred)
- 3/4 cup sugar
- 1 1/2 tsp vanilla extract
- 1/3 cup cocoa powder (Hershey’s Special Dark preferred)
- 1/8 tsp salt
- 1 1/2 tbsp red food coloring
- 1 tsp vinegar
- 2 large eggs (room temperature, about 70°F)
- 3/4 cup all-purpose flour
Cheesecake Layer
- 8 oz cream cheese (Philadelphia original block, softened)
- 1/4 cup sugar
- 1 large egg
- 1/2 tsp vanilla extract
Instructions
- Preheat and prepare pan: Preheat the oven to 375°F. Grease an 8×8 inch baking dish or 9-inch square pan thoroughly with butter or cooking spray to prevent sticking and ensure easy removal of the brownies.
- Make the brownie batter: Melt butter in a medium saucepan over low heat. Remove from heat and stir in sugar until combined. Add vanilla, cocoa powder, salt, red food coloring, and vinegar. Mix until the cocoa is fully incorporated and the mixture is a deep burgundy color. Beat the room-temperature eggs lightly in a small bowl, then stir into the chocolate mixture until smooth. Gently fold in flour with a spatula until just combined. Reserve 1/4 cup of this batter in a separate bowl for topping.
- Form the brownie base layer: Pour the larger portion (approximately 3/4) of the red velvet batter into the prepared baking dish, spreading it evenly to cover the bottom and corners. This base provides the rich, fudgy foundation for the brownies.
- Prepare the cheesecake layer: In a separate bowl, beat softened cream cheese with sugar until smooth and fluffy, about 1-2 minutes. Add the egg and vanilla, beating until combined with no lumps. Spread this cheesecake mixture evenly over the brownie base layer gently to avoid mixing the layers.
- Create the marbled top: Spoon small dollops of the reserved 1/4 cup red velvet batter over the cheesecake layer. Using a thin knife or skewer, swirl the batter gently in a figure-8 or back-and-forth motion to create a decorative marble pattern. Avoid overmixing to keep distinct layers.
- Bake: Bake in the preheated oven for 30-35 minutes until the top is set but still slightly jiggly in the center. The cheesecake should be mostly set and brownie edges will pull away slightly from the pan.
- Cool and chill: Remove from oven and cool to room temperature on a wire rack for 1-2 hours. For best results, refrigerate for at least 1 hour to let the layers fully set and cheesecake firm up for clean cuts.
Notes
- Use room-temperature eggs to ensure smooth batter consistency.
- Reserve some batter before adding flour to create decorative top swirls.
- Do not overmix when folding in flour to keep brownies tender and fudgy.
- Allow brownies to cool completely before cutting to maintain clean pieces.
- Refrigeration helps the cheesecake layer firm up and stabilizes the brownies.
- Kerrygold butter adds richness; substitute with any unsalted butter if needed.
- Red food coloring intensifies the classic red velvet look.
- Prep Time: 15 minutes
- Cook Time: 30-35 minutes
- Category: Dessert
- Method: Baking
- Cuisine: American
Keywords: red velvet brownies, cheesecake brownies, marbled brownies, chocolate dessert, classic red velvet, layered brownies, holiday dessert

