
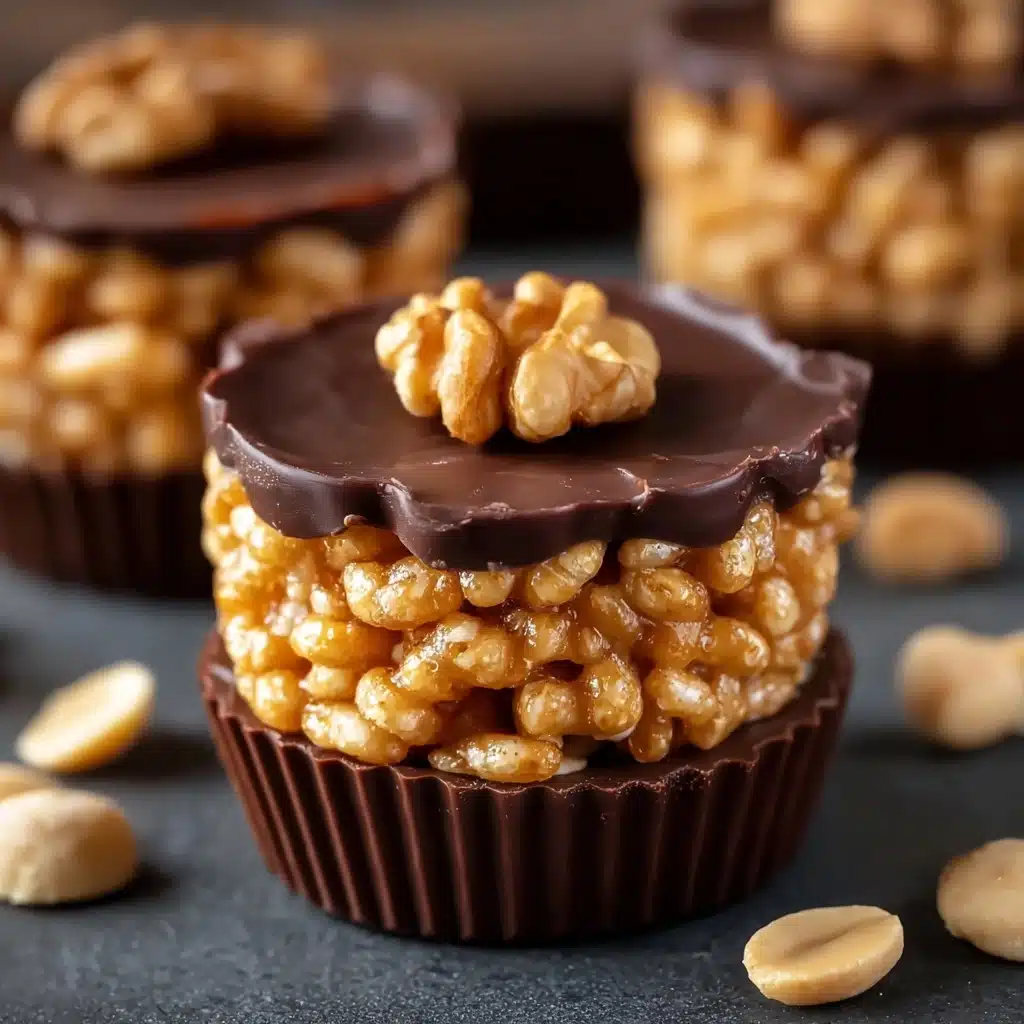
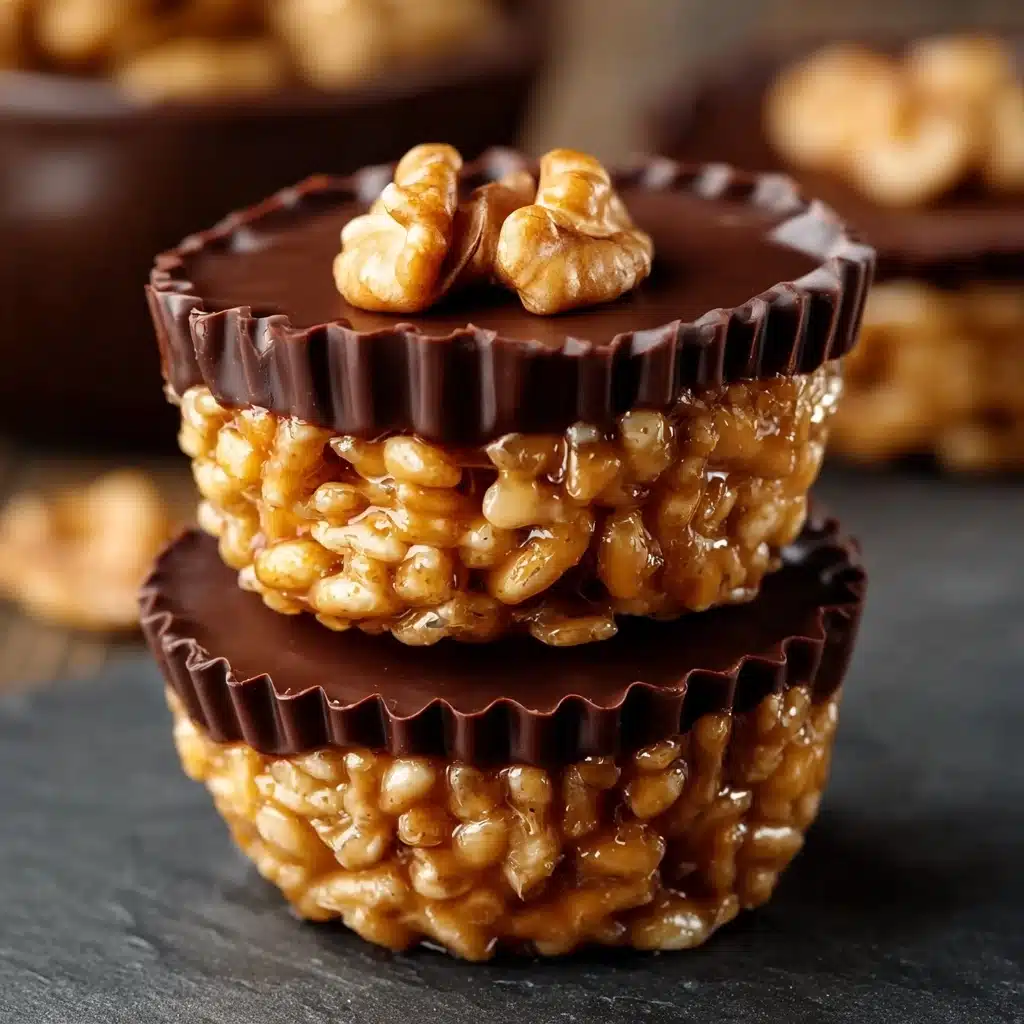
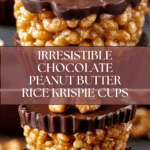
Chocolate Peanut Butter Rice Krispie Cups Recipe
If you’re searching for the ultimate treat that combines nostalgia, crunch, and all your favorite flavors, look no further than Chocolate Peanut Butter Rice Krispie Cups. Each bite balances nutty peanut butter, gooey marshmallow, and a glossy cap of chocolate, all layered atop the iconic crispy crunch. They’re quick to make, no-bake, and every bit as delightful for kids as for adults—perfect for any gathering, gift, or late-night snack attack.
Ingredients You’ll Need
What makes these Chocolate Peanut Butter Rice Krispie Cups absolutely magical is just how simple and approachable the ingredient list is. Every staple plays its role: creamy mouthfeel from peanut butter, chewy marshmallows for classic gooeyness, and, of course, the snap of Rice Krispies that everyone loves.
- Rice Krispies cereal: Delivers lightness, crunch, and that classic texture that gives the cups their playful bite.
- Creamy peanut butter: Brings richness and that irresistibly nutty flavor that pairs perfectly with chocolate.
- Unsalted butter: Adds a silky base and melds the sticky elements together, plus helps with a satisfying chew.
- Mini marshmallows: These are key for the cup’s signature gooeyness and subtle sweetness throughout.
- Chocolate chips: The crowning touch—melted and spread over the top for that decadent finishing layer.
- Vanilla extract (optional): Deepens aroma and flavor, making the whole treat even more inviting.
- Pinch of sea salt (optional): A tiny sprinkle brings all the flavors into focus and heightens the sweet-salty balance.
How to Make Chocolate Peanut Butter Rice Krispie Cups
Step 1: Melt the Base
Start by placing the butter and mini marshmallows in a medium saucepan over low heat. Stir them gently but consistently—this makes sure everything melts evenly without scorching. You’re aiming for a smooth, glossy mixture that’s ready to hug every crunchy grain of cereal.
Step 2: Add Peanut Butter
Once the marshmallow mixture is totally smooth, take the saucepan off the heat and mix in the creamy peanut butter, plus vanilla extract if you’re feeling extra rich. Stir until the mixture is fully combined, glossy, and decadently thick—the scent alone will tempt you to sneak a spoonful!
Step 3: Mix with Cereal
Pour your Rice Krispies into a large bowl and top with the warm peanut butter-marshmallow mixture. Gently fold everything together, making sure every single cereal piece gets enveloped in that luscious coating. Don’t rush this part: patience means more even, cohesive cups later!
Step 4: Shape the Cups
Line your muffin tin with paper liners for easy release (and less cleanup). Scoop the mixture into each cup evenly, then lightly press the tops to create a flat surface—perfect for receiving the chocolate topping.
Step 5: Add Chocolate Layer
In a microwave-safe bowl, melt your chocolate chips in 20-second bursts, stirring in between until smooth and pourable. Dollop a spoonful of melted chocolate onto each cup, smoothing it out to the edges. If you like a punch of flavor, finish with a teeny pinch of sea salt right on top.
Step 6: Set & Serve
Let your Chocolate Peanut Butter Rice Krispie Cups cool at room temperature for about 20 minutes, or pop them in the fridge if you’re impatient and want to set the chocolate faster. Once they’re firm and set, peel away the liners and admire your stack of crave-worthy creations!
How to Serve Chocolate Peanut Butter Rice Krispie Cups
Garnishes
If you’re dressing up these cups for a special event, try a light dusting of crushed peanuts, colorful sprinkles, or even a drizzle of white chocolate across the tops. Each addition gives them a bespoke twist and an extra punch of personality!
Side Dishes
While Chocolate Peanut Butter Rice Krispie Cups are more than enough to steal any dessert table, they’re lovely alongside a scoop of vanilla ice cream or paired with fresh strawberries for a sweet, cool contrast. For a sophisticated twist, serve with espresso or coffee to bring out their chocolatey notes.
Creative Ways to Present
Have fun with presentation! Stack the cups on a pretty cake stand, or nestle them in parchment inside a decorative box for a thoughtful foodie gift. For parties, arrange on a platter with small popsicle sticks inserted for easy grab-and-go style. However you serve them, expect a rapid disappearance!
Make Ahead and Storage
Storing Leftovers
Keep leftover Chocolate Peanut Butter Rice Krispie Cups in an airtight container at room temperature for up to 4 days. They’ll stay chewy, crispy, and absolutely snackable—but honestly, they rarely last that long!
Freezing
Want to make a batch in advance? These cups can be frozen! Just layer them between sheets of parchment or waxed paper in a freezer-safe container. When stored this way, they’ll keep their flavor and texture for up to 2 months—simply let thaw for 15-20 minutes before enjoying.
Reheating
While you won’t need to reheat these treats—their magic is in being eaten at room temperature—if you love a touch of melty chocolate, microwave one cup for 5–8 seconds. The topping softens up, giving you a gooey, almost lava-cake experience without any of the fuss.
FAQs
Can I use chunky peanut butter instead of creamy?
Absolutely! Chunky peanut butter adds pops of nutty texture, so if you like extra crunch and a bit of surprise in every bite, feel free to swap it in.
What’s the best way to melt chocolate chips without burning?
The microwave method is quick and safe: heat in short 20-second intervals, stirring each time. You can also use a double boiler over simmering water for extra control and silky results.
Are Chocolate Peanut Butter Rice Krispie Cups gluten-free?
If you use certified gluten-free Rice Krispies cereal and check that your marshmallows and chocolate chips are also gluten free, these cups absolutely can be made gluten-free. Just confirm all your labels before starting!
Can kids help make these?
They sure can! Kids love pressing the Rice Krispie mixture into muffin cups and adding the chocolate. Just supervise the stove and melted chocolate parts for safety, and let them get creative with garnishes.
How do I prevent the Rice Krispie mixture from sticking to my hands?
Try rubbing your hands or the back of a spoon with a little butter or coconut oil before pressing the mixture into the muffin cups. This keeps things tidy and ensures you get those nice, compact layers.
Final Thoughts
There’s nothing quite like sharing a plate of Chocolate Peanut Butter Rice Krispie Cups with the people you love. They’re fun to make, hard to resist, and guaranteed to spark smiles around the table. Give them a try—you might just find your new favorite sweet treat!
Print
Chocolate Peanut Butter Rice Krispie Cups Recipe
- Total Time: 25 minutes
- Yield: 12 cups 1x
- Diet: Vegetarian
Description
These Chocolate Peanut Butter Rice Krispie Cups are a delightful fusion of sweet, salty, and crunchy flavors all in one bite-sized treat. Perfect for parties or as a fun snack, these cups are easy to make and even easier to enjoy!
Ingredients
For the Rice Krispie Base:
- 3 cups Rice Krispies cereal
For the Peanut Butter Layer:
- 1 cup creamy peanut butter
- 1/2 cup unsalted butter
- 1 cup mini marshmallows
- 1/2 tsp vanilla extract (optional)
- Pinch of sea salt (optional)
For the Chocolate Topping:
- 1 cup chocolate chips
Instructions
- Melt the Base: In a medium saucepan over low heat, melt butter and marshmallows while stirring consistently until smooth.
- Add Peanut Butter: Stir in peanut butter and vanilla extract (if using) until fully combined and creamy.
- Mix with Cereal: Pour the Rice Krispies into a large bowl and add the peanut butter mixture. Gently fold until all the cereal is coated evenly.
- Shape the Cups: Line a muffin tin with paper liners. Spoon the mixture evenly into each cup and press down gently to form a flat surface.
- Add Chocolate Layer: Melt chocolate chips in the microwave (20-second intervals, stirring in between). Spoon melted chocolate over each cup and spread evenly. Sprinkle with sea salt if desired.
- Set & Serve: Allow the cups to cool at room temperature for 20 minutes or place them in the refrigerator to set faster. Once firm, remove the paper liners and serve!
- Prep Time: 15 minutes
- Cook Time: 10 minutes
- Category: Dessert
- Method: Baking
- Cuisine: American
Nutrition
- Serving Size: 1 cup
- Calories: 220
- Sugar: 12g
- Sodium: 150mg
- Fat: 15g
- Saturated Fat: 6g
- Unsaturated Fat: 7g
- Trans Fat: 0g
- Carbohydrates: 20g
- Fiber: 1g
- Protein: 4g
- Cholesterol: 10mg
Keywords: Chocolate, Peanut Butter, Rice Krispies, Dessert, Snack, Party Food
