
A Quick and Easy Delight Recipe
If you’re searching for that perfect sweet treat to impress guests or indulge your own cravings, these Butterfinger Balls are absolutely irresistible. In just a few simple steps, you’ll create bite-sized spheres bursting with peanut butter, crunchy graham cracker, and a signature Butterfinger snap, all encased in chocolate. What makes this treat truly special is how it lives up to its name: A Quick and Easy Delight. You don’t need fancy equipment or extra time—just a handful of pantry staples and the urge to whip up something both nostalgic and crave-worthy!
Ingredients You’ll Need
This recipe is all about simplicity—each ingredient has a purpose, and together they create layers of flavor and crunch. The end result is rich, snappy, and perfectly balanced with just the right amount of sweetness.
- Butter (4 tablespoons, softened): Adds richness and helps create that magical creamy texture when blended with peanut butter.
- Vanilla Extract (1 teaspoon): Just a dash boosts the whole flavor profile, bringing warmth and aroma to the mix.
- Peanut Butter (1 cup, avoid all-natural): For maximum creaminess and stable texture—classic creamy peanut butter is your friend here.
- Powdered Sugar (1 cup): Sweetens gently and helps bind our base, ensuring every bite is tender and luscious.
- Graham Cracker Crumbs (¾ cup): These add an unexpected light crunch and a toasted flavor smooths out the filling.
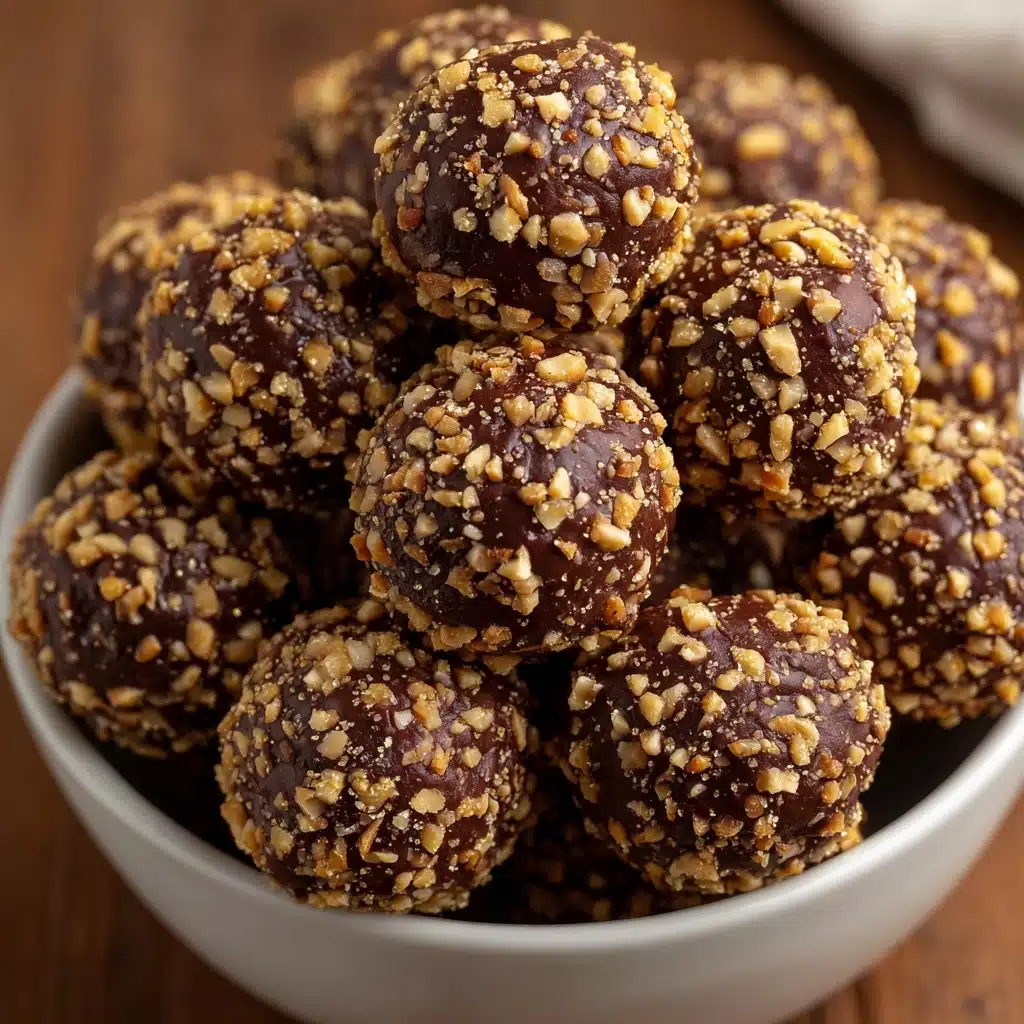
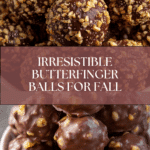
- Crushed Butterfinger Bars (½ cup): The star of the show—these bring in that signature toffee-peanut crunch and a burst of orange color through every bite.
- Chocolate Bark or Chips (8 ounces): Your crisp, shiny coat—pick milk or dark, and melt it to silky perfection for dipping.
- Optional Toppings: Sprinkle extra crushed Butterfinger, use festive sprinkles, or a pinch of coarse sea salt to add a special touch.
How to Make A Quick and Easy Delight
Step 1: Mix the Base
Grab a large mixing bowl and your favorite mixer—stand or hand-held, both work marvelously. Add the softened butter and creamy peanut butter, then cream them together on medium speed until you see a fluffy, uniform blend. Now, stir in the vanilla extract, ensuring it’s sprinkled evenly so the flavor goes into every spoonful. This dreamy base will become the glue that holds all the delicious elements together for your Butterfinger Balls.
Step 2: Add Sweetness and Crunch
At this stage, you’ll bring the sweetness and texture into play. Add the powdered sugar gradually—start your mixer on low and scrape the bowl occasionally to make sure everything gets incorporated smoothly. Next, gently fold in the graham cracker crumbs and crushed Butterfinger bars until the mixture looks speckled and cohesive, with delicious little flecks of orange and golden crispiness throughout. This combination ensures every bite is balanced between creamy, crunchy, and sweet!
Step 3: Form the Balls
Line a baking sheet with parchment paper—it’ll make cleanup a breeze. Scoop out about 1 to 1½ tablespoons of the mixture for each ball, then roll them between your palms for perfect rounds. Don’t stress perfection—slightly rustic shapes make them even more charming. Space each ball out so they don’t stick together as they chill. Once you’re finished rolling, you’ll have a delightful little army ready for the chocolatey next step.
Step 4: Chill to Set
Pop your tray of formed balls into the freezer for at least 30 minutes. This crucial step firms them up, which makes dipping them in chocolate later a total breeze. If you have a busy kitchen schedule, they’re fine staying in there a bit longer—just don’t skip chilling, or you’ll have a sticky mess on your hands later!
Step 5: Melt the Chocolate
While the balls chill, turn your attention to the chocolate. Place your chocolate bark or chips in a microwave-safe bowl. Heat in 30-second intervals at about 50 percent power, stirring well between each zap. You want it smooth and glossy, not scorched. Take your time here—patience pays off with the perfect silky coating for your A Quick and Easy Delight.
Step 6: Dip and Decorate
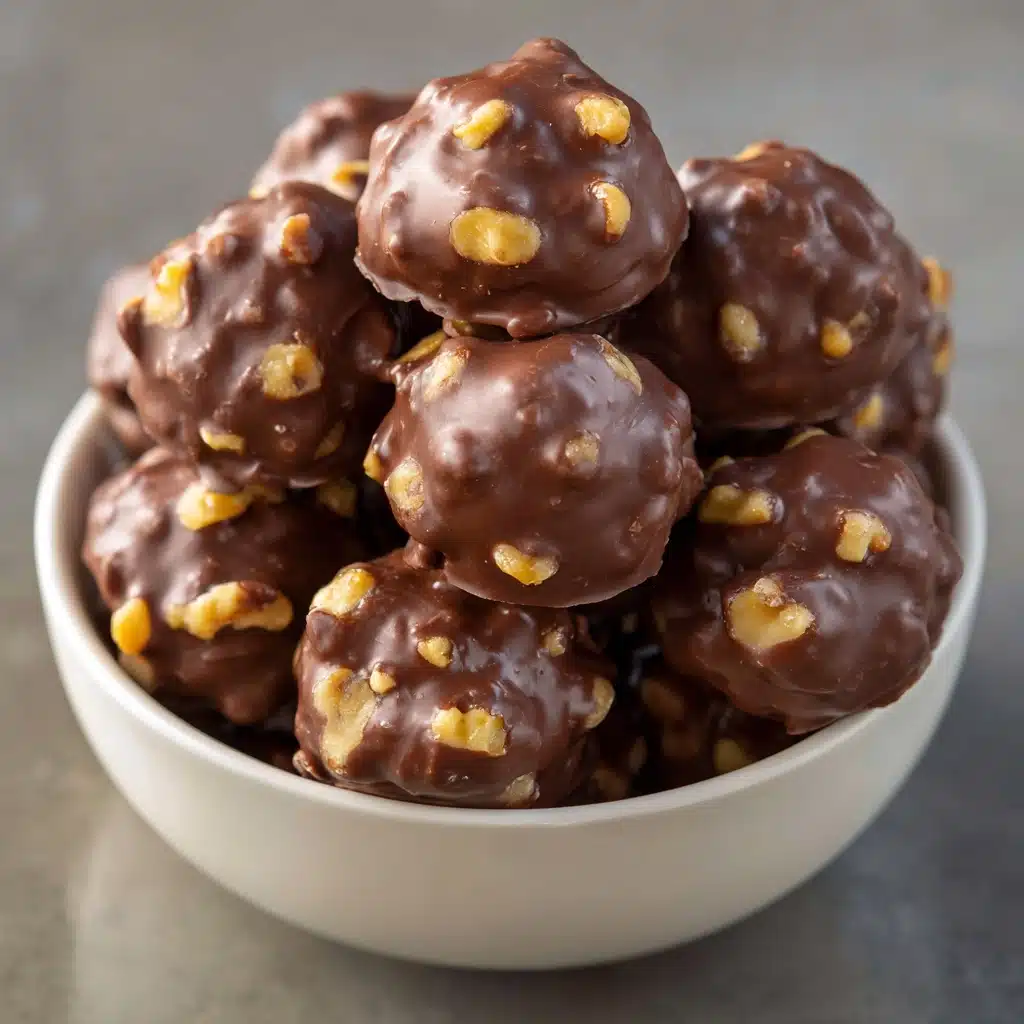
Take those chilled balls one by one, and dip them into the melted chocolate using a fork or dipping tool. Get creative—go for a full dip or just halfway for a trendy look. Before the chocolate sets, sprinkle with crushed Butterfinger, festive sprinkles, or even a little coarse sea salt for an extra pop. This is your chance to make them fun and festive, whether for a party, holiday, or just a weekday treat.
Step 7: Let Them Set
Transfer the finished Butterfinger Balls back to your parchment-lined sheet and let the chocolate coating harden completely. If you’re in a rush (or it’s a warm kitchen day), you can pop them back in the fridge for a quick set. Once they’re firm, the outside will have a satisfying snap that gives way to the soft, peanut-buttery, crunchy interior—the ultimate A Quick and Easy Delight!
How to Serve A Quick and Easy Delight
Garnishes
Give your Butterfinger Balls a memorable finishing touch! Extra crushed Butterfingers sprinkled over the top will wow fans of that classic crunch. For a festive vibe, shake on colored sprinkles to match the season or your event. Or, for a grown-up sweet-and-salty twist, a pinch of coarse sea salt elevates these bites to a whole new level. Each garnish adds its own personality—don’t be afraid to mix and match!
Side Dishes
Butterfinger Balls are rich, so they pair beautifully as part of a dessert platter. Set them alongside fresh fruit for a refreshing contrast, offer them with mini brownies, or serve with coffee or tea to balance the sweetness. If you’re hosting, they also look great nestled between cookies, fudge, or other small-scale treats for a full-on dessert buffet.
Creative Ways to Present
Think beyond the basic serving tray! Arrange your Butterfinger Balls in colorful cupcake liners for a pretty presentation, stack them in a glass jar for homemade gifting, or layer them on a tiered stand for instant elegance. For parties, skewer them on popsicle sticks like cake pops. However you present them, these treats will always steal the show as A Quick and Easy Delight.
Make Ahead and Storage
Storing Leftovers
Place fully set Butterfinger Balls in an airtight container and store in the refrigerator. They’ll keep fresh for up to a week—if they last that long! Keep layers separated with a piece of parchment or wax paper to prevent them from sticking to each other.
Freezing
For longer storage, these treats freeze wonderfully and actually retain their taste and texture for months. Lay the balls in a single layer on a tray to freeze individually, then transfer to a ziplock bag or airtight container. When a craving hits, simply grab what you need—a true A Quick and Easy Delight whenever you want it.
Reheating
No need to reheat these; they’re best enjoyed chilled or at room temperature. If frozen, let them thaw in the fridge or on the counter for about 20 minutes before serving. Their texture and flavor will be just as dreamy as the day you made them.
FAQs
Can I use all-natural peanut butter?
It’s best to avoid all-natural peanut butters for this recipe. The kind that separates can alter the texture of the mixture and may cause your Butterfinger Balls to fall apart. For A Quick and Easy Delight, stick to classic creamy varieties for the best consistency and flavor.
What’s the best way to crush Butterfinger bars?
Place Butterfinger bars inside a ziplock bag and crush them using a rolling pin or the back of a heavy pan. Aim for a mix of fine crumbs and small chunks—this gives your Butterfinger Balls that classic texture everyone loves!
Can I double the recipe for a bigger crowd?
Absolutely! This recipe doubles (or even triples) perfectly. Just make sure to mix the ingredients thoroughly, and use multiple baking sheets if needed. More Butterfinger Balls means more A Quick and Easy Delight for everyone!
How do I keep the chocolate coating smooth and shiny?
Use a good-quality chocolate bark or chips and melt gently at half power, stirring often. Don’t overheat, as chocolate can seize or dull. For an extra glossy coat, add a teaspoon of coconut oil when melting the chocolate—it works wonders for sheen and smoothness!
Can I make these ahead of time for gifting?
Yes! These Butterfinger Balls are ideal make-ahead treats. Store in an airtight container in the fridge or freezer, and package them in bakery boxes or jars lined with parchment. They’ll hold up beautifully, making them the ultimate A Quick and Easy Delight for special occasions or thoughtful gifts.
Final Thoughts
If you’re ready to dazzle your friends and satisfy your sweet tooth in record time, look no further than these Butterfinger Balls. They’re a crowd-pleaser, loaded with beloved flavors and the kind of texture that keeps everyone reaching for just one more. Go ahead—make a batch and enjoy the A Quick and Easy Delight for yourself!
Print
A Quick and Easy Delight Recipe
- Total Time: 1 hour
- Yield: Makes about 24 balls 1x
- Diet: Vegetarian
Description
These Butterfinger Balls are a delightful treat that combines the rich flavors of peanut butter, chocolate, and crunchy Butterfinger pieces. Easy to make and perfect for any occasion!
Ingredients
Base:
- 4 tablespoons butter, softened
- 1 teaspoon vanilla extract
- 1 cup peanut butter (avoid all-natural varieties that separate)
Sweetness and Crunch:
- 1 cup powdered sugar
- ¾ cup graham cracker crumbs
- ½ cup crushed Butterfinger bars
Coating and Toppings:
- 8 ounces chocolate bark or chocolate chips, for coating
- Optional: extra crushed Butterfinger bars, festive sprinkles, coarse sea salt for topping
Instructions
- Mix the Base: In a large bowl, use a hand or stand mixer to cream together the peanut butter and softened butter until smooth. Add vanilla extract and mix until combined.
- Add Sweetness and Crunch: Gradually mix in the powdered sugar at low speed, scraping the sides of the bowl as needed. Fold in graham cracker crumbs and crushed Butterfingers until the mixture is evenly combined.
- Form the Balls: Line a baking sheet with parchment paper. Scoop about 1 to 1½ tablespoons of the dough and roll into balls. Place them spaced apart on the sheet.
- Chill to Set: Freeze the formed balls for 30 minutes or until completely firm.
- Melt the Chocolate: In a microwave-safe bowl, melt the chocolate bark or chips in 30-second intervals at 50% power, stirring between bursts until smooth. Be careful not to overheat.
- Dip and Decorate: Dip each chilled ball in the melted chocolate—either fully or halfway. Immediately top with additional crushed Butterfingers, sea salt, or sprinkles before the chocolate sets.
- Let Them Set: Allow the chocolate coating to harden completely before serving or storing.
Notes
- For best results, use a creamy, traditional-style peanut butter.
- Feel free to customize the toppings to your liking, such as adding chopped nuts or drizzling with white chocolate.
- Store the Butterfinger Balls in an airtight container in the refrigerator for up to one week.
- Prep Time: 20 minutes
- Cook Time: 10 minutes
- Category: Dessert
- Method: Mixing, Chilling, Melting, Dipping
- Cuisine: American
Nutrition
- Serving Size: 1 ball
- Calories: 160
- Sugar: 12g
- Sodium: 95mg
- Fat: 9g
- Saturated Fat: 4g
- Unsaturated Fat: 4g
- Trans Fat: 0g
- Carbohydrates: 17g
- Fiber: 1g
- Protein: 3g
- Cholesterol: 5mg
Keywords: Butterfinger Balls, Peanut Butter, Chocolate Coating, Dessert Recipe
