
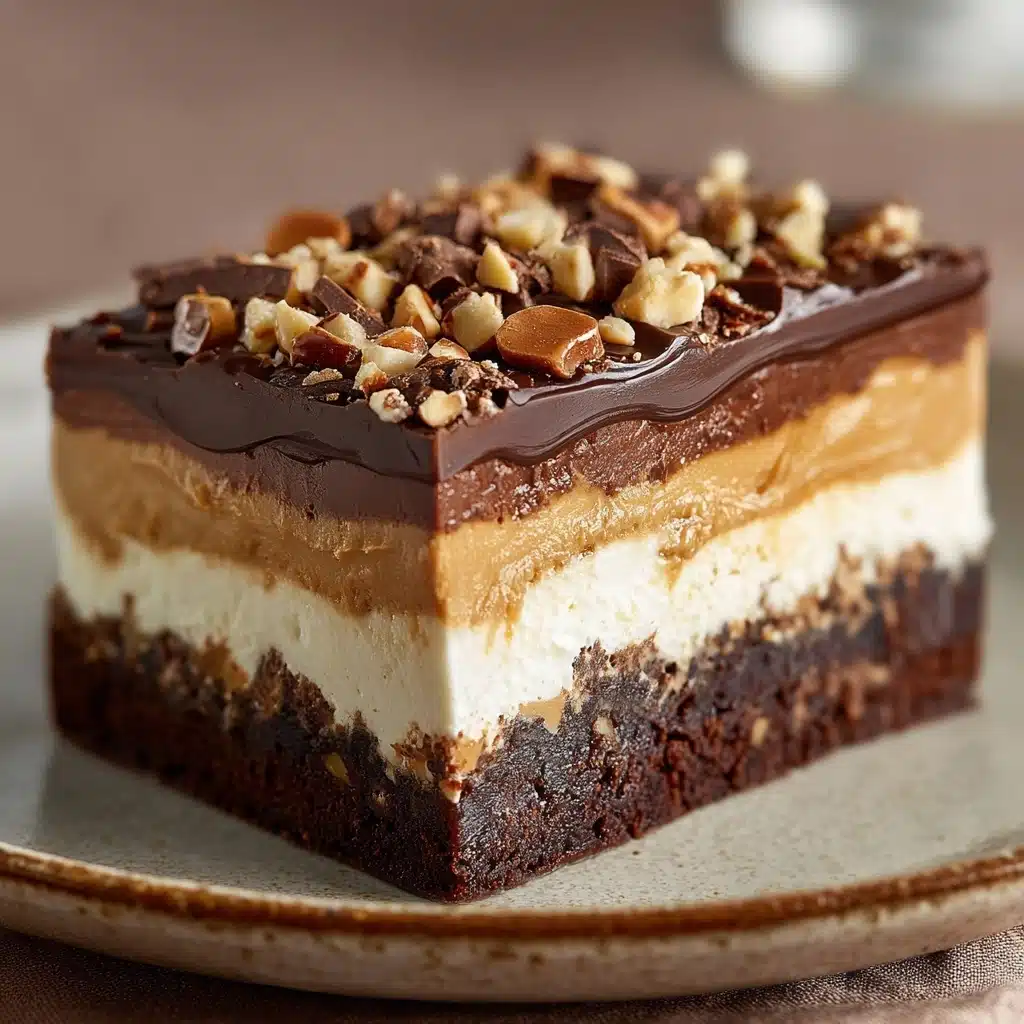
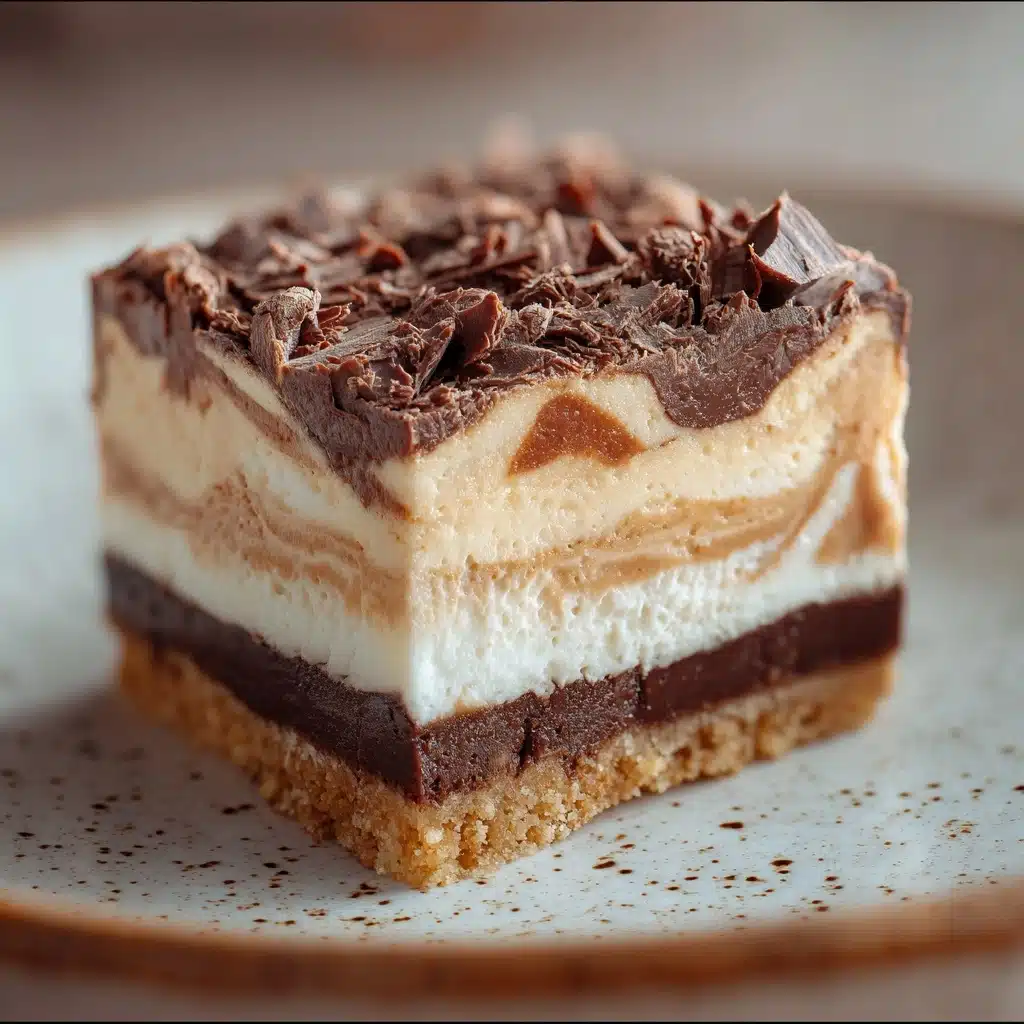
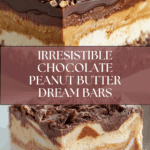
Chocolate Peanut Butter Dream Bars Recipe
If you’ve ever daydreamed about the ultimate marriage of chocolate and peanut butter, Chocolate Peanut Butter Dream Bars are about to make your dessert dreams come true. Imagine a buttery graham cracker crust, a creamy, luscious peanut butter center, and a silky-smooth chocolate topping—all layered into pure bliss. These bars are rich in flavor, deliver a perfect textural contrast in every bite, and disappear alarmingly fast whether at a celebration or as a weeknight treat. Let’s dive in and make these Chocolate Peanut Butter Dream Bars a part of your sweetest memories.
Ingredients You’ll Need
The beauty of these bars lies in their simple, pantry-friendly ingredients, each one working overtime to elevate the entire dessert. Trust me, every component brings something special to the table—whether it’s richness, crunch, or irresistible creaminess.
- Unsalted butter (1 cup, melted): This is the backbone of the crust, lending richness and a slightly crisp bite to the base.
- Graham cracker crumbs (2 cups): For that nostalgic crunch and sturdy foundation that soaks up all the buttery goodness.
- Granulated sugar (1/4 cup): Adds just enough sweetness to balance and bind the graham base.
- Creamy peanut butter (1 cup): Brings that signature nutty, smooth flavor we all adore in these bars.
- Powdered sugar (1 cup): Sweetens and helps firm up the peanut butter layer for sliceable, creamy perfection.
- Unsalted butter (1/2 cup, softened): Ensures the peanut butter filling stays silky and luscious.
- Semisweet chocolate chips (1 cup): Delivers a deep cocoa kick to contrast the sweet, nutty middle.
- Heavy cream (1/4 cup): Makes the chocolate topping glossy and soft enough to slice—no cracking here!
- Unsalted butter (2 tablespoons): Added to the chocolate layer for next-level silkiness and shine.
How to Make Chocolate Peanut Butter Dream Bars
Step 1: Preheat and Prepare the Base
Begin by preheating your oven to 350°F (175°C). This starts everything on the right foot, so your crust will have just the right crisp yet tender texture. While the oven is heating, gather all your ingredients—trust me, these bars come together quicker when everything’s ready at hand.
Step 2: Mix the Graham Cracker Crust
Take a medium bowl and mix together the melted butter, graham cracker crumbs, and granulated sugar. Stir until the mixture looks like damp sand—every crumb should glisten with buttery flavor, and this blend will become the perfect bottom layer for your Chocolate Peanut Butter Dream Bars.
Step 3: Press and Bake the Crust
Tip the buttery crumbs into a 9×13-inch baking pan and press them down firmly and evenly. You can use the back of a spoon or your fingers—just make sure the layer is tight so it holds together. Slide the pan into the oven for 10 minutes. The crust turns beautifully golden and ever-so-slightly crisp, ready to support the layers above.
Step 4: Cool Slightly
When the crust comes out of the oven, let it cool for a bit—just until it’s warm, not hot. This helps the next layer spread smoothly and prevents melting, keeping those lovely layers defined.
Step 5: Make the Peanut Butter Layer
In a separate mixing bowl, combine the creamy peanut butter, powdered sugar, and softened butter. Beat until silky and smooth, with no lumps left behind. This mixture will taste impossibly decadent and make your Chocolate Peanut Butter Dream Bars extra dreamy.
Step 6: Spread the Peanut Butter Mixture
Gently spread the peanut butter filling over the slightly cooled crust. Use a spatula to get an even layer—it’s okay if it swirls or looks a bit rustic; that’s the charm of homemade bars!
Step 7: Prepare the Chocolate Topping
Combine the semisweet chocolate chips, heavy cream, and 2 tablespoons of butter in a microwave-safe bowl or double boiler. Heat gently, stirring every 20 seconds if using a microwave, until everything is melted and silky-smooth. The goal: a glossy ganache that will top off your Chocolate Peanut Butter Dream Bars in style.
Step 8: Top and Chill
Pour or drizzle the smooth chocolate mixture over the peanut butter layer. Tilt the pan or use the back of a spoon to spread the chocolate all the way to the edges. Place the pan in the refrigerator and chill for at least 2 hours. This step is non-negotiable; it allows every layer to set up for clean slicing and gorgeous presentation.
Step 9: Slice and Savor
When everything is firm, slice your Chocolate Peanut Butter Dream Bars into 24 pieces. Each bar boasts those jaw-dropping layers, so don’t be surprised when your friends ask how you managed to make something so stunning (and delicious!) at home.
How to Serve Chocolate Peanut Butter Dream Bars
Garnishes
A little flourish goes a long way here! Try sprinkling a few chopped roasted peanuts, a dusting of extra graham cracker crumbs, or even a drizzle of melted peanut butter or white chocolate over the top for added flair. Each option adds texture and makes your Chocolate Peanut Butter Dream Bars feel bakery-worthy.
Side Dishes
These bars are rich, so pair them with something light and refreshing. Fresh berries, a scoop of vanilla ice cream, or even a cold glass of milk are perfect sidekicks. Their simplicity helps balance the bars’ sweet, decadent filling and ensures every bite is bliss.
Creative Ways to Present
Go beyond the classic square! Cut the bars into triangles for a fun twist, use mini cupcake liners for grab-and-go treats, or arrange them on a vintage cake stand for a dramatic effect. Chocolate Peanut Butter Dream Bars also shine on a dessert buffet or as edible gifts, neatly wrapped in parchment and tied with a ribbon.
Make Ahead and Storage
Storing Leftovers
Place leftover bars in an airtight container, separating layers with parchment paper to prevent sticking. They’ll stay fresh in the refrigerator for up to a week, but be warned: they rarely last that long in my house.
Freezing
Chocolate Peanut Butter Dream Bars freeze beautifully! Cut the fully chilled bars, wrap each in plastic, and store in a freezer-safe bag or container. They’ll keep well for up to 2 months, just let them thaw in the fridge before serving for best texture and flavor.
Reheating
No reheating necessary—these bars are best enjoyed chilled or at cool room temperature. If you do prefer a slightly softer bite, let them sit on the counter for 10-15 minutes before indulging.
FAQs
Can I use crunchy peanut butter instead of creamy?
Absolutely! Using crunchy peanut butter will add a fun texture and tiny peanut pieces throughout the middle layer. Just make sure to spread it evenly for the best effect.
Do I have to bake the crust?
Yes—a quick bake is essential for the graham cracker base to become sturdy enough to hold up under the creamy layers. It’s just 10 minutes, and this little step makes all the difference in the final result!
Can I make Chocolate Peanut Butter Dream Bars gluten free?
Of course! Simply substitute gluten-free graham crackers for regular ones, and double-check that your other ingredients are certified gluten-free. You’ll get the same delicious effect, minus the gluten.
What if I don’t have heavy cream for the chocolate topping?
No heavy cream? No worries! You can use whole milk in a pinch, though the chocolate layer may set a bit firmer. The cream simply adds that extra silkiness and luxurious mouthfeel.
How far in advance can I make these bars?
These bars are perfect for making ahead! You can prepare Chocolate Peanut Butter Dream Bars up to two days in advance. Just keep them tightly covered in the refrigerator until you’re ready to slice and serve.
Final Thoughts
If you’re looking for a crowd-pleasing treat or just want to spoil yourself with something special, Chocolate Peanut Butter Dream Bars are truly a must-try. Each bite brings nostalgia and joy, with a flavor combination nobody can resist. I hope you’ll treat your loved ones—and yourself—to a pan of these dreamy bars soon!
Print
Chocolate Peanut Butter Dream Bars Recipe
- Total Time: 2 hours 30 minutes
- Yield: 24 bars 1x
- Diet: Vegetarian
Description
Indulge in the decadent combination of chocolate and peanut butter with these irresistible Chocolate Peanut Butter Dream Bars. A buttery graham cracker crust, creamy peanut butter layer, and rich chocolate topping make these bars a dreamy dessert for any occasion.
Ingredients
For the Base:
- 1 cup unsalted butter, melted
- 2 cups graham cracker crumbs
- 1/4 cup granulated sugar
For the Peanut Butter Layer:
- 1 cup creamy peanut butter
- 1 cup powdered sugar
- 1/2 cup unsalted butter, softened
For the Chocolate Topping:
- 1 cup semisweet chocolate chips
- 1/4 cup heavy cream
- 2 tablespoons unsalted butter
Instructions
- Preheat & Prepare Base: Preheat oven to 350°F (175°C). Mix melted butter, graham cracker crumbs, and granulated sugar. Press into a 9×13-inch pan. Bake for 10 minutes, then cool.
- Make the Peanut Butter Layer: Combine peanut butter, powdered sugar, and softened butter. Spread over the base.
- Prepare the Chocolate Topping: Melt chocolate chips, heavy cream, and butter. Pour over the peanut butter layer.
- Chill & Serve: Refrigerate bars for at least 2 hours. Cut into 24 bars and enjoy!
Notes
- You can sprinkle chopped peanuts or chocolate shavings on top for extra flair.
- Store leftover bars in an airtight container in the refrigerator.
- Prep Time: 20 minutes
- Cook Time: 10 minutes
- Category: Dessert
- Method: Baking
- Cuisine: American
Nutrition
- Serving Size: 1 bar
- Calories: 280
- Sugar: 18g
- Sodium: 160mg
- Fat: 20g
- Saturated Fat: 10g
- Unsaturated Fat: 8g
- Trans Fat: 0g
- Carbohydrates: 23g
- Fiber: 2g
- Protein: 5g
- Cholesterol: 25mg
Keywords: Chocolate Peanut Butter Dream Bars, Dessert Recipe, Peanut Butter Bars, Chocolate Bars

